Image Slider

Friday, March 31, 2017

April Instagram Challenge

March certainly came in like a lion and is leaving like a lamb. Today it is sunny with a high of 84 degrees here in Louisiana! The exit of March is also marked by the end of our Instagram Challenge and the beginning of a new one tomorrow. I learned so much about my phone camera (and about Android phone cameras) and hope that I can keep the tips in mind as I take pictures for this next challenge.

If you would like to join us, just post a picture on Instagram that matches the prompt for each day and be sure to tag it with the hashtag #MTAprilAlphabet2017. I created the prompts with April and Spring in mind, but feel free to interpret them any way you want. If you get behind or need to skip a day, no worries--just jump back in whenever you can.

Here is April's list.  You can save this to your phone so that you always have it with you---I mark mine as a favorite so I can easily find it.

Picture Practice - Free Choice & Resources

Day 31 - Free Choice & Resources

Well, it's the last day of March and the last day of our Picture Practice challenge. It was great for me to learn along with you and practice these techniques each day. In the future, I think we'll have lots of opportunities for even more practice. I often get in a hurry to "get the shot" and forget to take a breath and focus on my composition or focus, so this has been a good way to keep those things fresh in my mind.
Today, choose your own technique, choose your subject and have fun with it.
If you want to learn more about taking your phone photography up a notch, here is a list of resources you refer to.
iPhone Photography School - While this site features iPhones, there is a ton of information that is useful for any phone camera.
Digital Photography School - There are so many tips on this site for both DSLR photography and phone photography and it is all free.
Android Central - Specific to all the controls and tips to using the camera on your Android phone.
500pxISO - So many tips for taking the very best pictures you can with your smart phone
Thursday, March 30, 2017

Picture Practice - Collage

Day 30 - Collage

Today's prompt will give you a chance to practice making a collage of photos to display on Instagram or other sharing sites. Many of you may already be familiar with this process, but I will review how to do it on several different apps.

Let's start with the Instagram app itself. (This is not my favorite way to create collages because I like the layout options of other apps better).
1. Load a photo that you would like to include in your collage.
2. Tap the collage icon that is second from right. This opens the Layout app that is connected to Instagram.
3. Swipe the top of the screen to the left to choose a layout.
4. For each section of the layout, you can choose "replace" to add a different photo to the collage.

5. Once you are happy with the result, tap "DONE".
6. You can choose other options for each section as well---Mirror and Flip.  Just be sure that you have highlighted the section that you want to adjust.

7. Lastly, you can add a border between the photos of the collage before displaying it on Instagram.

A Beautiful Mess app.
1. Tap the collage icon.
2. Pick which layout you want to use.
3. Select a section and add a photo from your camera roll (which will appear at the bottom of the screen)
4. Once you have completed your collage, you can adjust the "frame size" (or borders) by selecting the icon on the far right.
5. If you want to leave one of your sections blank, you can choose either a background or color to fill it by selecting those icons.
6. When you are happy with your collage, click the check mark in the upper right corner.
7. Click DONE and it will ask if your are finished before saving it to your camera roll.

Project Life app
This is often my preferred app, because you can make a 4x6 collage, rather than a square one. I can crop it later in Instagram if I want to use a square or leave it rectangular if it fits the images better.
1. Tap the Collage icon (which is the divided rectangle).
2. Tap the layout icon in the upper left corner to choose which layout you'd like to use.
3. Swipe the choices to the left and pick a layout.
4. Tap on a section and choose the "Photo" icon to add a photo.
5. Tap on the "Card" icon to choose a card from your library.
6. Once your are finished, tap the arrow in the lower right corner and choose "Export" to save it to your photo library/gallery.
7. If you use Project Life to make a collage for Instagram, remember that if you crop it to a square, you will lose some of the collage. Of course, you can always choose to keep it in a rectangle shape, as well.

Now, you pick the pictures and make a collage!


Wednesday, March 29, 2017

Picture Practice - Panoramic

Day 29 - Panoramic

Panoramic shots are those that capture a scene that is wider than a typical photograph can capture. They are really a series of images that are stitched together to form a single wide-angle shot. While DSLR cameras need a special wide-angle lens or editing to produce a panoramic photo, our phone cameras come equipped with the tools to capture a panoramic shot quite easily. It only takes a little bit of practice to capture a great scene, since your phone's built-in panorama does a great job at stitching together the multiple images.
Here are some simple directions for using your phone's panoramic feature:

iPhone
1. With your phone turned in portrait/vertical position, open your camera app and tap the "Pano" button. This opens the panoramic feature, which looks like this.
2.  Point your camera at the spot on the LEFT SIDE where you would like your photo to begin. (Sorry, left-handers, this is the only option you have)
3. Tap your screen and allow a moment for your phone to focus.
4. Tap the shutter button and slowly turn your phone to the right, being careful to keep the tip of the arrow on the line. (This helps keep everything lined up so that there are no wonky angles in your photo) Do not move your feet or camera, if possible, and just turn it slowly to the right. The more closely your phone stays on a pivot point, the better the shot. Your phone will give your on-screen directions if you are moving too fast or too slow, etc.
5. Once you have reached the end of your photo, tap the shutter button to stop shooting.

Here is an example of NOT holding the image steady on the tip of the arrow--you can see the zigs and zags in the finished photo.
Here is the same scene shot with a pretty steady hand.
Android
1. Open your camera app and swipe to get your choices.
2. Select Panorama mode and be sure your phone is in Portrait/vertical position.
3. Point your camera at the sop on the LEFT SIDE where you would like your photo to begin.
4. Allow a moment for your camera to focus.
5. Slowly move your phone to the right. Do not move your feet or camera, if possible, and just turn it slowly to the right, trying to keep it as level as possible. SomeAndroid phones have an alignment box to help you keep the scene aligned.  If your model does not have that box, you might try lining the bottom or top of your screen with something to help ensure there are no wonky angles in your photo.

When you are sharing your panoramic shots on Instagram, be sure to allow them to keep their original shape. If you crop them to the typical Instagram square, you will lose the effectiveness of the image.

And just in case you need a tutorial in how to do that, here it is (the examples are from an iPhone, but I think that Androids will look pretty much the same).

* Once you upload your photo to the Instagram app, you will see several icons across the screen.
* Tap the sizing icon--the one on the far left with the little arrows, which will adjust your photo to its original rectangular shape. There will be white space above and below your photo, but that's okay.
Tuesday, March 28, 2017

Picture Practice - Skyline

Day 28 - Skyline

When I hear the word skyline, I typically think of an image showing the various buildings that make up a city. Some skylines are jagged and coarse, while others are rather faint and smooth. We are all able to recognize the skylines of famous cities such as New York City or Paris, France simply by the shape of their iconic buildings, however, generally speaking, we often take for granted the city that we call home. We don't take time to stop and appreciate the landmarks and sights that make our own home city such a wonderful place to be. A really good city image not only showcases the skyline itself, but also captures something of the essence that makes it unique. Obviously, it is impossible to capture it all in one photograph, but showing one aspect of your city's life can make the photo more interesting to the viewer.
Here are some tips to try and incorporate when shooting a skyline today.

* Find a good vantage point. This may mean moving just outside of the city limits, moving to a higher point or perhaps even crouching down low to hide distractions.
* One of the best times for shooting city skylines is when the sun is just beginning to set, so that there is still some blue in the sky, but the light is not too harsh.
* If you shoot in full light, let the light be behind you so that it lights the buildings well.
* Focus on the corner of a building. Getting good focus will ensure that your image is crisp and clean. This is fairly easy to do with a phone camera since you have a set depth of field.
* Include foreground interest. This is an especially good idea if there is "empty" space in the front since you will be focusing on something in the distance.

* Shoot the skyline as a silhouette.
* Be sure that your buildings and horizons are straight.
The main things that define a city may differ depending on the time of day and even the season. During the morning or on weekends, the city may look calm and peaceful, while it is a bustling with activity during the weekdays. I can't wait to see what makes your community special.


Monday, March 27, 2017

Picture Practice - Blur

Day 27 - Blur

You probably thought this lesson was going to be about bokeh, or background blur again, but this time I'm talking about motion blur.  In my post about burst photos, we used that function to stop/freeze the motion and you may wonder why in the world we would want to purposely blur the focus when we've worked so hard to get it sharp. Obviously, this is not something you do to every photo, but it can be very effective to exaggerate motion and create a sense of excitement. I haven't really tried using motion blur before, so I am anxious to to give it a try as well.
 Source: Picsart
Panning is a technique that will allow you to create photos where the subject is fairly clear and the background is blurred by motion. To do it, simply move your camera with your subject. This means that you will actually move your phone itself--if your subject is moving from left to right, your camera will move (or turn) from left to right as well, matching the movement of the subject. Because the shutter speed in your phone camera is fairly slow, your subject should stay in focus, while the background will be blurred, giving the impression of movement.
Source: Picsart

Using a slow shutter speed is the best way to capture motion blur when using a DSLR, so using an app such as Camera+ that allows you to slow down the shutter speed (keeps the lens open for a longer period of time) should create the same effect with a phone camera. The key to remember when using a very slow shutter speed is that the camera must be held very steady, so this is a good time to use a small tripod or steady the camera on a stable surface.

Finally, motion blur can be added after a photo is taken using editing apps. iColorama ($2.29) for both iPhones and Androids, has a motion blur option and Focus In Motion ($0.99) which is for iPhones only, is designed specifically for that purpose. I purchased Focus In Motion and tried it out with an old photo I had on my phone.  Here is a before/after so you can compare.

BEFORE:

AFTER:

This was pretty fun to play with, but there is definitely a learning curve. There is a "bubble" that you can place over the subject that you want to stay in focus (you can adjust the shape horizontally or vertically). I couldn't seem to get it shaped well for this picture, so I then discovered that there is an option to "paint over" your subject with your finger.  This was much more accurate, although I should have used a smaller brush size, as you can see above. Then you press the "Blur" button and choose the direction you want the blur to go. Have fun capturing motion today, even if you have to do it in an editing app.
Sunday, March 26, 2017

Picture Practice - Depth

Day 26 - Depth

Well, when I set up these prompts, I didn't really realize how much we would have already talked about Depth and how several of the techniques we've practiced enhance the illusion of depth in such great way. But, let's go on and study it a bit more. Creating a dramatic sense of depth can take a two-dimensional image and give it a real three-dimensional feel.  We've already talked about using leading lines, diagonal lines and framing to enhance the sense of depth, but there are a couple more ways to achieve it.

**Layering - Overlapping objects help the viewer to recreate the three-dimensional scene in their mind. This allows them to become a part of the photo, as if they are seeing it firsthand. Of course, the Smoky Mountains provide a great example of layering! Layering is most effective when there is a noticeable difference in the color and/or texture of the layers.
In this next photo, the layering is provided by both the mountains and the clouds. Even the reflections in the water seem to provide some depth.
**Include a foreground object - We talked about this a bit in the Landscape lesson, but here it is emphasized again. Not only can a foreground object provide a sense of scale, but it portrays the depth of the image more accurately as well.
 **Shoot in Portrait mode - I am so used to shooting things in landscape/horizontal mode, that I sometimes forget to turn my camera vertically, in portrait mode. Now that Instagram will allow rectangle photos as well as square ones, there are no limits on the shape. Shooting vertically often allows your eyes to narrow their focus side-to-side and see more of the depth of the image. Next time you prepare to take a horizontal shot, double-check to be sure that it would be more interesting in portrait mode.

Saturday, March 25, 2017

Picture Practice - Lens Flare

Day 25 - Lens Flare

Lens flare is occurs when the strong rays of light hit the camera lens and produce a slight sun burst. This light can create light streaks  or reduction in contrast and saturation. If you are like many phone photographers, you probably have accidentally produced lens flare at one time or another and immediately deleted it because you thought you had ruined the image. Photographers have used all sorts of tricks to avoid it or minimize it, but I think it is time to learn to use it to your advantage.

When I took the photo below, I used the zoom and the Camera+ app to adjust the exposure and took 2 different photos.  I took this one first, but I was trying to capture the sky, so I exposed it to the sky and tried again, since this one seemed over-exposed.
Here is the second photo. While the sky has more character, the mushroom in the foreground got lost in the dark.
Once I was able to review the photos, I was surprised to see the lens flare in the first photo. The sky is over-exposed, but it produced such a sparkly flare on the dew that I loved it.

Shooting directly into the sun can definitely over-power your subject if you are not careful, so it is tricky to achieve a balance that is appealing to the viewer. You can do this by cropping some of the light out the photo.
 One other trick is to use an object to mask some of the light source. In both of the photos below, I used the trees to black our some of the light. As I looked at the screen, I was able to move around until I could see the "starburst" effect and then snapped the picture.
I hope that today provides you with an opportunity to get outdoors and some sun to practice this with. Have a sun-filled day!


Friday, March 24, 2017

Picture Practice - Timer

Day 24 - Timer

There are many uses for the timer function on your camera, but it often allows the photographer to be in the picture rather than behind the lens. The same is true with your phone. It is really easy to use, but is often overlooked, so let's go through the steps to use it.  (By the way, I probably should have mentioned this before, but if you have an iPad, the options are just the same as on the iPhone.)
iPhone
1. Open the camera app.
2. Across the top of your screen, there are several icons. From left to right, they represent:
Flash, HDR, Timer and Filters.  Yep, the timer button is the one that resembles a tiny clock.  Click on it.
3. You have the option for either 3 seconds or 10 seconds. I always choose 10 seconds--which is just barely enough time to get back into place if you are going to be in the photo.
4. Once the camera fires, it does a set of 10 burst images, so that you can pick the one you like best (just like in our previous lesson)

Android
1. To access the timer, be sure it is "On" in your camera settings (tap the settings icon at the top of your camera screen). You can choose 2 seconds, 5 seconds or 10 seconds. I would choose 10 seconds since it just barely give your enough time to get into place if you are going to be in the photo.
2. You also have the option to choose whether you want the camera to take 3 consecutive shots (like a burst). I would also choose this, as it will give you a better chance of getting a good shot).
3. Once this has been activated in your settings, a timer icon (like a small clock) will be on your camera screen.  Tap that icon and then take your picture.
4. If you activated the 3 consecutive burst shots in your settings, you can then go through the steps we talked about previously to select your favorite shot.

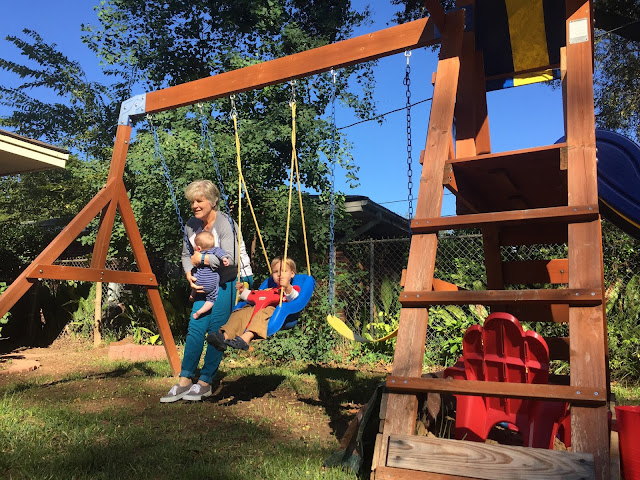
While "selfies" are a really popular way to be "in the picture", the timer on your phone provides another way to compose your images while including yourself.  Another great use of the timer function is to get a better picture if you don't have steady hands.  Sometimes, holding the phone is a particular position causes my hands to shake a bit more than others. Pressing the shutter button actually shakes the camera even more. This is a great time to use the timer: You can activate the 10 second timer, set the camera in a steady spot such as in a beanbag or on a tripod and let the timer set off the shutter rather than your finger.

In the photo below, I zoomed in, set my focus, then activated the timer. I quickly set it back down against a piece of driftwood to take the picture.
For timed pictures, I actually like using the Camera+ app best. It allows options of 5 seconds, 15 seconds and even 30 seconds. In many cases, having that longer time is very desirable to get yourself or objects into the correct position. The other thing that I find very helpful is that when it gets down to three seconds, it counts down out loud so you know when the photo is about to be taken.

One final note, most of us enjoy taking photos of children, scenery or beautiful flowers, but don't really enjoy taking or looking at photos of ourselves. When I see a photo of myself, I instantly notice that one of my eyelids is always droopy, that I needed to hold in my tummy or see the dark circles under my eyes. Sadly for me, I often let those things overshadow the twinkle in my eye or the bright smile. But, when I look back at the photos of my family when I was growing up, I never see those things in my parents. My daddy was almost always the photographer, and although she is no longer with me to ask in person, I suspect that my mama was a bit camera-shy. There aren't very many pictures of her and even fewer of my daddy. I would give anything these days to have selfies of them or photos where they set a timer to get in a photo along with us. I bet your children and grandchildren feel the same way about you!!  So get out from behind that phone and get into some pictures!!
Thursday, March 23, 2017

Picture Practice - Just A Hint

Day 23 - Just a Hint

Today's prompt is probably one of my favorites--especially for Instagram/phone photos. Because of my daughter and her husband's desire to keep their children's identities private on social media, I use this technique often and have found that it really helps me connect with and appreciate tiny details more.  (Can you tell I love little feet and hands???)
Look at the difference in the next two photos.
  *  Such a sweet photo of two cousins at the library.
** This photo, while it has a distracting purse in the background, captures the connection between the two cousins, without even seeing their faces.
And in this next pair of photos I took while on a walk with the grandkids, the first shows Toddler D looking at a dog through the slats of a wooden fence. I know that because I was there, but it is hard to tell by just looking at the photo.
However, the next photo is much more interesting. While we don't know for sure what he is looking at, we do know that it is interesting to him! And all we can see is the back of a toddler and a fence. I simply moved behind him and asked him to look again while I snapped this picture.  (Does anyone else think those knots in the wood look like a fox above him??)
While I use this technique when photographing the children, it also a great way to add interest to other photos as well.
The pattern and repetition in the bark of this tree takes center stage when that is all that is showing.
And how about this beautiful pink rose.
It really becomes a dramatic picture when only a portion is seen and the distractions are cropped out of the picture.
While you can certainly crop a photo to produce this effect, taking a photo with this end-result in mind allows you to really focus on the tiny details, so try doing it straight out of the camera for today.
The other day, while babysitting, I was taking a few pictures of BabyD2 as he pulled up on various objects. I really wanted to remember the details in his tiny feet--how they curl "just so" when he pulls up and how he raises up on his tippy-toes to reach for Papaw's remote control. So I took this photo:

Custom Post Signature

Custom Post  Signature